Thursday, August 18, 2011

No Assembly Required - Summer Bread Salad

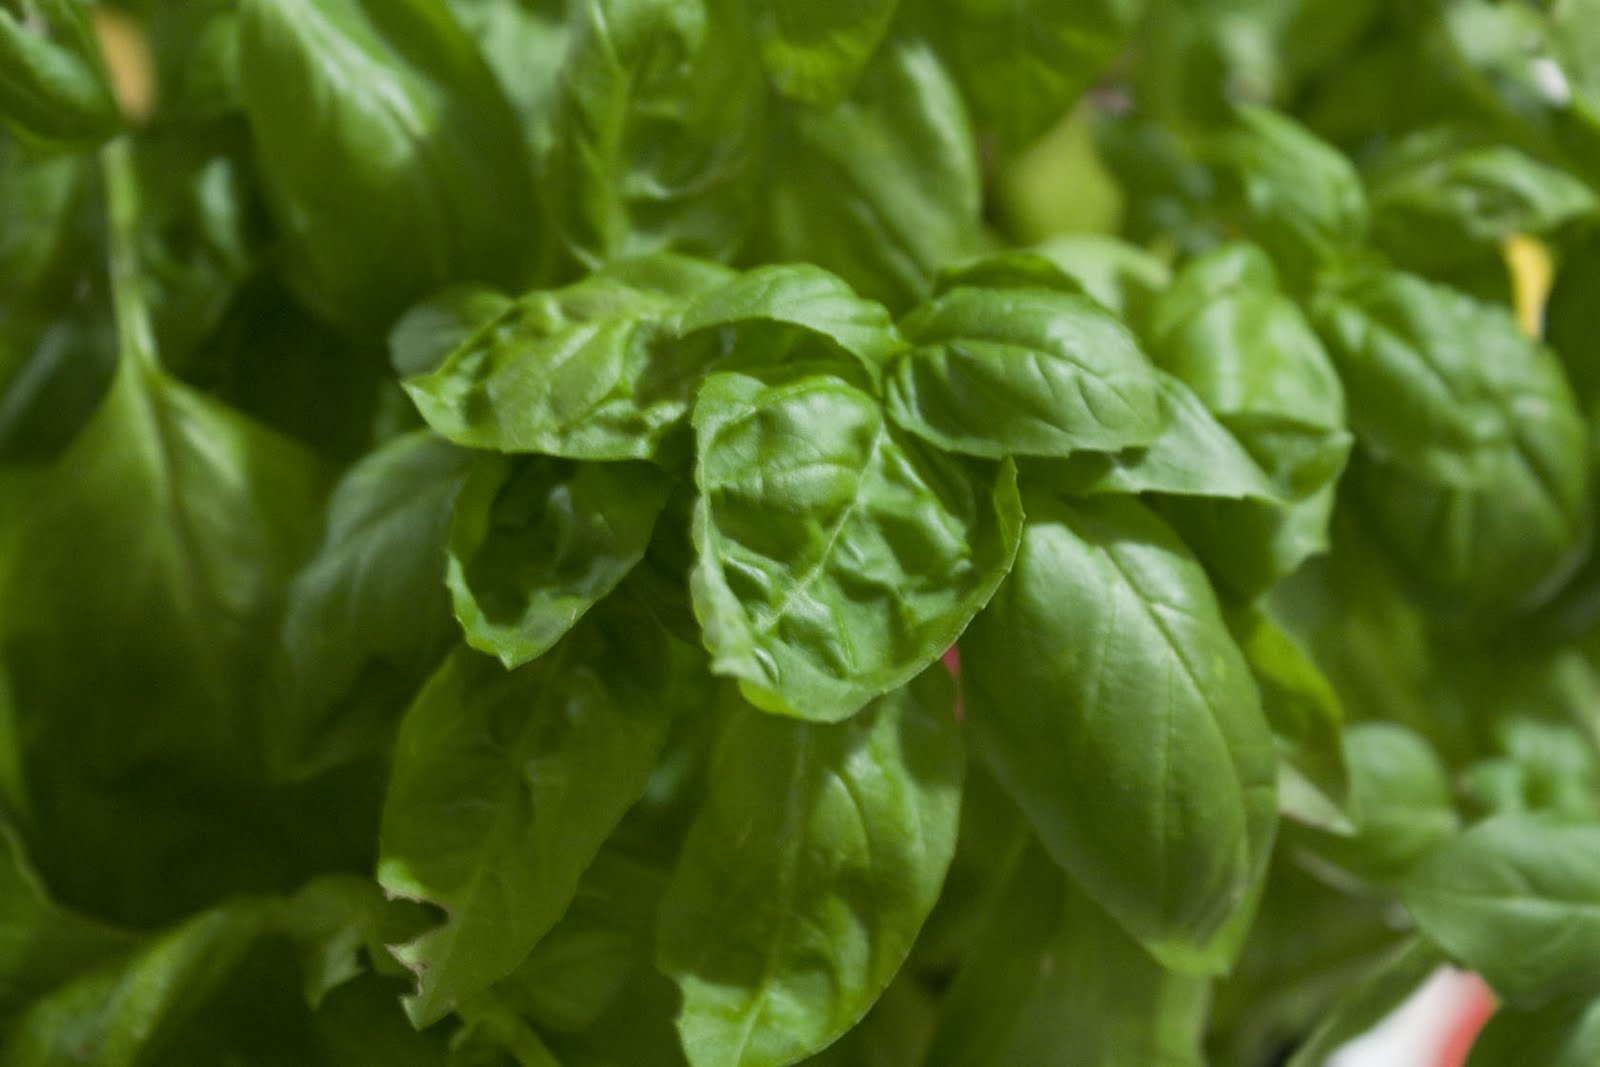
I have been assembling a lot of Ikea furniture for the new apartment. There is only the “right” way to do this. If you have any pieces left at the end you are in trouble. Bread salad has no right or wrong way and no real recipe necessary. It goes together easily, uses up stale bread and bursts with the great tastes of August tomatoes and basil. Home grown tomatoes are key to this salad but if you want to make it in the winter plum tomatoes or cherry tomatoes will do.
Cut a loaf of day old good bread into bite sized cubes. Toss into a bowl. Cut up homegrown tomatoes or the best ones from the farmer’s market into similar sized cubes. Toss in. Cut one ball of fresh mozzarella into cubes. Toss in bowl. Chop or chiffonade some fresh basil. (here is how to chiffonade) Toss in.


At this point you declare it ready or add some cucumber, red onion, or any fresh ingredients you love in a salad. To dress just splash with red wine vinegar, drizzle with a little good quality olive oil. Season generously with salt and pepper. Serve immediately if you like your bread a little chewy or wait an hour for it to soak up all the tomato juices. I like it both ways. I have also used fresh bread but I make sure it is a chewy dense bread like a ciabatta, a bread too pillowy and soft will dissolve.

No worries with this salad. The only real requirements are good tomatoes and good bread and basil. No serious instructions required. But whatever you do don't do this:


Wednesday, August 10, 2011

The Beet Goes On

I bought a couple of bunches of beets at the farmer’s market last weekend. I love the vibrant red color, the earthy taste and the smoothness of the beet texture.  I usually slice them in a salad of field greens and walnuts or drizzle with balsamic but I wanted to do a recipe using the whole beet, including the greens. I decided on beet risotto.

I cooked the beets in the pressure cooker after slicing off the tops and setting them aside. I put a cup of water and the beets into the pressure cooker, slicing the larger ones in half and cooked for 15 minutes at pressure then released immediately. They came out perfect. I normally roast them drizzled in olive oil and wrapped in foil but I did not want to heat up the kitchen.  I peeled them under running water and sliced into small cubes and set them aside.


While the beets were cooking I soaked the greens in several changes of water in the sink to get rid of all the dirt and grit. I then shook them dry and sliced the stem off each leaf, putting the stems in their own pile. When I had all the stems separated from the beets I chopped the stems into small pieces and then sliced the leaves into narrow slices, still keeping the piles separate.


After I finished working on the greens, I heated a large non-stick pan spraying it with olive oil spray and added the stems only. I sautéed the stems for a few minutes until they were tender. I then added the sliced leaves and some raw garlic and just cooked until the leaves were wilted, stirring occasionally. I finished off with a splash of balsamic and let the balsamic cook off till no longer visible. I set the pan aside.


Cooking the beets and the greens can be done earlier in the day. If you refrigerated them let them come to room temp so they aren’t too cold when added to the risotto.


To make the risotto I set a pan of 4-6 cups of chicken broth to simmer on a back burner. I heated up my medium stockpot on the front burner and dropped in a tablespoon or so of butter and a little olive oil to keep the butter from burning. I cooked half a chopped yellow onion in the stockpot until it was tender, stirring occasionally.


I poured in one cup of Arborio rice and stirring watched until the rice kernels became translucent with a bright white inner core and a toasty aroma arose from the pan. I splashed in some white wine, enough to get every grain a little wet and cooked that off, stirring the whole time, until no liquid remained.


Now is was time for continually adding broth. I add a ½ cup or so of broth to the rice from the back burner, stirring continually, scraping the bottom. There should be enough liquid after each addition so that the rice look a little soupy but not drowning in liquid. I kept stirring until the  broth was absorbed. I repeated this adding broth and stirring for about 20 minutes. Every now and then I would stop to rinse some lettuce for a salad or slice a carrot, keeping a vigilant eye on the risotto. You don’t really have to stir it non-stop. Just don’t take a bathroom break or walk out to the mailbox.


I continued adding broth until the kernels of rice just start to get tender but still have a little chew in them. I  added the beet greens and beets then removed the pot from the heat so the residual heat would warm them. I stirred in a heaping tablespoon of mascarpone and a generous handful of parmesan. Normally I would add a ton of butter and cheese but I was trying to make a healthier version. I heaped it in my risotto bowIs and sprinkled with toasted walnuts before serving. It added a great crunch to the creamy risotto. The beautiful color did not disappoint and I felt like I was eating something pretty healthy and pretty tasty!


Thursday, July 28, 2011

The Queen of Beans


On my last visit to the San Francisco farmer’s market at the Ferry Building I made sure to buy one thing. Okay I actually made sure to buy several things – Recchuiti Chocolates, McEvoy Ranch Olive Oil and hand lotion, whatever fruit pastry is in season at Frog Hollow and finally, beans. I don’t mean the amazing collection of heirloom beans from Rancho Gordo (although I guess they are on my must have list too) but the big white gigante beans from Iacopi farms. These beans are sold dried in ziplock bags. The beans are huge to begin with but when cooked they balloon into these enormous, creamy pockets of delight unlike any other bean I have eaten. I would love to serve a bowl to all my friends who are bean haters (this means you Melinda!) I can’t help myself from eating these right out of the pot when they are done. These are the queen of beans.
So I have been eyeing my bag of beans I purchased in May. What dish would be worthy? I pulled out a recipe I have been saving from Food and Wine "Fragrant Gigante Beans with Garlic Confit and Mussels" and finally decided to make it. Not only does it call for gigante or giant limas but it also calls for garlic confit, which is another of my favorite things, and mussels, an unusual combination. I made it last night to rave reviews.


I cooked the beans in the pressure cooker so that eliminated soaking. Pressure cookers are great for all sorts of things but wonderful for cooking beans. Since these were big and unsoaked I cooked them for 50 minutes. I have an electric pressure cooker so I can just set it and walk away. You can also soak them overnight and cook on the stove covered with fresh water until tender.


Garlic confit is easily made. Find every spare clove you have and throw it in a small pan and cover with your cheapest olive oil. I usually leave on the final skin of the clove and just trim off the root end. Simmer for 20 minutes or so until the cloves are so tender they yield like butter when pierced with a fork or knife tip. You want just the essence of a simmer when you cook these – an occasional bubble leaks out from under a clove. Feel free to only partially place the pan on the burner if you can’t get the heat low enough. The recipe makes as many or as few as you like but I always want to make extra to spread on bread or add to a cheese or antipasti plate. After cooking store the oil and garlic separately or throw out the oil if you are not going to use it in a couple days.

I followed the recipe for the most part. I substituted fresh parsley for the dill and chives called for at the end because that is what I had on hand. I served the feta table side and I was the only one who added it. The dish worked well both ways I thought so if you don’t have or like feta leave it out. Crusty bread is a must to accompany this dish, both for sopping up juices and eating the extra garlic confit.

The dish went together quickly once the beans were cooked. It could be served as a first course or an appetizer.

Monday, May 09, 2011

Springtime Supper


8 ounces angel hair pasta
1 pound asparagus
4 ounces pancetta
8 eggs
a chunk of good Parmesan cheese
Zest of half a lemon

Put a large pot of water on to boil. Also, put a skillet of water on to boil. Set out 4 plates.

Cut a pound of asparagus into 1/2 inch sections. Cube or buy prepared 4 ounces of pancetta. Throw the pancetta in a pan and cook briefly till crisp. If it starts to stick add a little olive oil. Drain on a paper towel.

Shred some parmesan on the box grater or use a vegetable peeler for large shards.

When the large pot of water boils, add the asparagus and cook for about 3 minutes or until the desired tenderness. I like mine a little crunchy. Remove with a slotted spoon to a bowl. Run cold water over the asparagus or shock it with some ice to stop the cooking. Drain and put in a large bowl.

Add 8 ounces of angel hair pasta to the pot the asparagus was cooked in (see - saves a little time and a pot.) Follow package directions being careful not to overcook the pasta. Drain and toss with the asparagus, drizzling with a little olive oil to keep the pasta from sticking.

Poach 1-2 eggs per person in the skillet of boiling water.

While the eggs are cooking prepare the plates. Put a pile of asparagus and pasta on each plate.
Remove the eggs when they are cooked the way you like them. Pile on top of the pasta. Sprinkle with the pancetta. Sprinkle with the parmesan. If you have a lemon lying around, zest a little lemon over the top.
Eat and enjoy!

Friday, March 18, 2011

Waiter, there's a beer in my pudding!


 I was looking for a dessert to go with the traditional corned beef and cabbage dinner on St. Pat's and stumbled upon this recipe for Chocolate Guinness Goodness. I happened to have some Great Lakes Brewery Edmund Fitzgerald Porter in the fridge and it sounded simple and delicious.

It didn't even dawn on me until recently that there was such a thing as homemade pudding until I saw a post on my friend Megan's blog A Sweet Spoonful on Butterscotch Pudding. I was reminded of this blog when I was looking for ideas for a personal chef client that loved old fashioned desserts. So I made some scratch chocolate pudding and my eyes were opened to how easy and delicious homemade pudding can be.

This recipe is a grown up pudding, perfect for a dinner party dessert when the menu focus is beer or just for a rich treat. The porter did not scream out from the recipe but gave an added richness. Guinness might leave a more obvious taste. I did not reduce the porter and add to the whipped cream, like the recipe said. I had some non-drinkers to serve and thought that might be offputting so I just sweetened the whipped cream. For adults I would take this extra step. I used Ghardelli Bittersweet chocolate chips for the chocolae. If you have pint glasses, the final dessert comes off looking like a glass of Guinness.

Should you finish off the extra beer even though it is 11 in the morning. You can't waste beer right? Just be careful it doesn't distract you and the cream boils over. Not saying this happened but it could, right?

Friday, March 04, 2011

Box of California

Opening shot: Woman bundled in warm clothes opens front door of house. Snow is piled up everywhere. She picks up a package left on the doorstep and carries it inside. Using a pairing knife, she slits the tape. She carefully folds back the flaps of the box. A golden glow eminates from the inside, bathing her in a mystical, warm, yellow light. (Think Pulp Fiction here.) She reaches in and pulls out a ...
Meyer lemon. This is California. Memories rush by. Our first rental house on the Bay had a Meyer Lemon tree laden with fruit year round, the sweet citrus scent so different than a regular lemon. And the life so short once picked.
So here I was with my box of California gold. The clock is ticking. What do I make? I have a whole file of Meyer Lemon recipes. Which one would do these beauties justice? Meyer Lemon marmalade with vanilla bean,? Mm that would be good but you have to do that whole sterilized jar thing. Meyer Lemon curd? Yes, delicious, a worthy option. I googled for a few more ideas and found it. The Shaker lemon pie. The pie uses the whole lemon, not a thing wasted but the pips. What better winter dessert to make than a sunny lemon pie!
 I found a version I like (there are plenty) on my friend Megan's website Shaker Lemon Pie. I trust Megan who is also Marge, a classic American bakery and forged ahead.
I sliced the lemons by hand with a very sharp knife. I should have used my mandoline but I didn't want to dig it out from the back of the cabinet. Then I poured sugar over them and let the lemon and sugar mixture sit on the counter for 24 hours. I would wander by every now and then and gaze longingly at them and give them a stir. And sigh.
The next day I tackled the pie crust. I am not a baker. Pet Ritz makes a fine pie crust. But again I trusted Megan and followed her recipe. I made it in the food processor and pulled it out when it was just starting to come together. I had my doubts. This would never stay together to roll out. I chilled it. Later I took it out of the fridge and began the scary task of rolling it out. Somebody share with me how you get that perfect circle when you roll it out! I get a raggedy edge misshapen thing. I kept rolling, swearing that it would never be large enough for my pie dish. My family steered clear of me while I muttered things about Megan and pies and making angry phone calls.
 I added some eggs, flour and butter to the filling and poured it into the shell. To my suprise I was able to crimp the edges and hide a few things and make a pretty darn good looking pie.


It was delicious. We ate while it was still warm. I closed my eyes and imagined myself on my deck in California, with the breeze carrying the scent of salt water and Meyer lemon blossoms. Thanks Dan and Liz for the box of California!

Wednesday, March 02, 2011

Melt - I apologize


I blame myself. I went in thinking Melt was a place that excelled in grilled cheese. Maybe it was all the postings on Facebook that showed patrons get 20% off for life for having a grilled cheese tattoo. Or the name. Or the menu heading "gourmet grilled cheese." I was so excited too. I had tried to get in previously and was told there was a 45 minute wait for a table and then a 45 minute wait for your food. All this for a grilled cheese? Okay if it is a really good grilled cheese it might be worth it. I have had some really good grilled cheese (Hog Island grilled cheese in SF.) So I persevered and went on a Sunday morning to insure a table.

I will say that is the time to go. The place was empty and we had a great waitress and a big disappointment. She made some recommendations and we ordered the February special which was Meatballs, cheese sticks, marinara sauce and mozzarella, the Big Popper - fresh jalapeno peppers, cheddar & herbed cream cheese, beer battered, mixed berry preserves and a BBQ chicken with grilled onions, sharp cheddar and a sweet BBQ sauce. Wait a minute - those aren't grilled cheese! Yes, they were grilled (except for the Big Popper which was fried) and yes, they had cheese on them. But that is where the relationship ends! I could have forgiven them the artistic license of calling all their sandwiches grilled cheeses if they had been any good.. Sad to say, all three of us came away disappointed. The thick bread overwhelmed the filling. There was none of that ooey gooey grilled cheese  - no strings of cheese after each bite. And the fries were so dark brown I thought they were sweet potato fries. They came piping hot and soggy. No crispness.

So I apologize to Melt. I should have ordered the Kindergarten - the only straight up grilled cheese on the menu. Then I could judge their grilled cheese.

Friday, February 25, 2011

Duck Fat

Yep - that is a big old blob of duck fat. A friend offered it to me. I think I thought I was getting a nice little carton of duck fat like I used to buy at the San Rafael Farmer's market. Nope just a 5 pound bag of fat. A little daunting. Thanks to a recommendation of a friend I rendered it by putting it in a slow cooker on low, melted it slowly and strained it twice and ended up with 2 quarts of the most beautiful, pristine duck fat.

 One of my favorites things to do with duck fat. Fingerling potatoes boiled until tender, cut in half then cooked in duck fat until they are a beautiful brown. Mmmmm.
Complete the meal with baby lamb chops rubbed with fresh rosemary, thyme, olive oil, garlic and salt; roasted Brussels sprouts drizzled with walnut oil and roasted walnuts and of course fingerling potatoes cooked in duck fat.

I keep thinking about confit. But I don't want to waste the rest on one dish. Duck fat french fries? duck fat chicken wings? fried eggs in duck fat? I am open to suggestions...

Monday, November 08, 2010

Here's Looking at You, Pig!


Roasted Pig Head is not on many menus. So when we went to dine at The Greenhouse Tavern I encouraged my husband to try it. Notice how I didn’t order it. I only wanted to see it and then have a nibble. I wanted to order the Duck N’ Pumpkin Pasta. My husband likes to order things he can’t get at other places or at home. And pig’s head is not on the menu at home any time soon, so after a little encouragement he ordered it.

Sure enough, glazed with a shrimp paste BBQ sauce, a half of a pig’s head, along with a pile of lettuce cups and a pile of slaw arrived at the table. We were in pig shock. It is rare that any meat in the U.S. comes to the table blatantly reminding us what it looked like before the dinner bell rang. And as a cook and a follower of food trends I knew that staring your dinner in the face, literally, is a current trend. Go see the turkeys running around the pen that will grace your Thanksgiving table. Oogle the cute piglets. But when the time comes to prepare it the head has been removed by and the face is gone.

John gamely picked up his fork and ate away. It was a little unsettling when he removed the jaw bone (with teeth) to get to another juicy bite. I have to say it was a pretty tasty. It would have been even better eaten the way it was supposed to be eaten. We forgot and ignored the lettuce cups and slaw. Apparently the diner was supposed to make little lettuce cup tacos, piled with pig meat and julienne raw veggies in light vinagrette. We came close to just tearing at it with our hands and biting it right off the bone. Me eat meat not little lettuce cups. I guess we forgot. I would love to go back and give it another try the way the chef intended. And if I got the chance to meet Porky, trotting around, before dinner and would bravely do so and thank him for the upcoming meal.

(Side note: If you ever go - order the Confit Chicken Wings and the Foie Gras Steamed Clams. Both would make a great entrée and were amazingly good.)


Saturday, October 30, 2010

Babler Chili

My husband's extended family holds a picnic at Babler State Park in St. Louis every October. Aunts and uncles, nieces and nephews, grandmas and great-grandmas everywhere, hugging hello then claiming a picnic table for their branch of the Waldschmidt family tree.  Each family brings a pot of chili. There’s no contest or judging. That’s just always been the main food. After twenty years plus of attending I can just peek into the pots, stir, and tell which family brought which chili. The recipes don’t change much over the years.

Except ours. One year John decided to make chili. But he wanted it to stand out from all the other chili. So he made a Chicken White Bean Chili. You would have thought it was Thanksgiving and we had brought Osterich. Everyone ooh-ed and ahh-ed. It created quite a stir. So henceforth John would spend one day a year making a non-traditional chili for the Babler gathering. (Oh my God! Such a production – but that’s another story.)

This year we drove nine hours to St. Louis to attend Babler. I did not want to relinquish my kitchen and my sanity so for the first time ever I made the chili. Cooked and froze it in Ohio and threw it in the car.  I was inspired by the flavors of fall that just itch to be used.


Fall Harvest Chili
Don’t let the long list of ingredients scare you. It's mostly spices. This goes together in a few minutes and then simmers on the stove. Perfect for a day of watching football or the World Series.1 pound of round steak, trimmed and cut into small cubes
1 medium onion, chopped
1 bottle of pumpkin ale
4 cups of Butternut Squash, cubed and cooked
½ can pumpkin
1 14 ounce can of zesty tomatoes
1 can of Rotel
1 14 oz. tomato sauce

Spices:
(I kept these separate because you would be afraid to make this chili when you saw how long the list of ingredients is. Feel free to eliminate, substitute, and add.)

1 T. ground Aleppo pepper
2 T. chili powder
1 T. cumin
1 T. salt
2 bay leaves
½ teaspoon cinnamon
1 teaspoon smoked paprika
2 cups of cooked beans

Season the round steak with salt and pepper and brown in a little oil in a large pot. Remove from the pot and add the onions. Cook until translucent and starting to brown. Add the beef back to the pot and add all the rest of the ingredients. Stir to combine. Bring to a boil, reduce heat and simmer for as long as you have time for. You could simmer it for a half hour or three hours. The flavors will meld and change the longer you cook it. If you don’t want to eat it right away, cool and store in the fridge.

You could top it with sour cream, cheddar cheese and pepitas if you want to jazz it up. A perfect dish for a cold fall day.

Tuesday, August 24, 2010

Baking Tips - Chocolate Chip Cookies


When I was dating my husband, one million years ago, every single time we went to his mother’s house there were homemade chocolate chip cookies. I don’t recall anyone ever making homemade cookies at my house (okay - maybe it happened once but I must have been outside at the time.) So a fresh batch seemed like a miraculous thing. And to have them just lying around like it was no big thing! Homemade cookies!
I have known my mother-in-law 32 plus years. She has never failed to have Toll House in the house. We would walk in for a family dinner or dropping off our daughters for an evening out and even though we were heading out for dinner my husband and I would begin scouring the pantry and freezer for the cookies. She never failed us. We would munch them on our way out the door to dinner. And when we recently visited St. Louis we left with two large bags of cookies. Most never made it to Ohio, it is a long drive after all.
It seems like a silly thing to blog about – homemade chocolate chip cookies. I am sure everyone has made a batch but since I have had chocolate chip cookies made by an expert and I have to make 60 extra large cookies for a catering event I thought it might be a good way to share some baking tips I have picked up along the way. These tips are not for the accomplished bakers who I am sre know more but for the occassional cookie maker.

Tip #1 - Lay out the ingredients before starting. 4 batches ready to go


Since I was making 4 batches of cookies I decided to get my ducks in a row and lay out all the ingredients by the batch. Baking is precise and not really my strong point. I tend to get distracted by bright shiny objects and then realize I was baking and wonder if the baking soda made it in. Which then requires starring closely at the flour to see if you can see the slight shift in color and texture of baking soda somewhere in the mound…you get my drift. Getting everything ready before you bake helps.
Tip #1 - I tore off 8 sheets of foil and laid out 4 batches of cookie ingredients, putting the eggs and butter with each batch, keeping the baking soda and salt in their own distinct little piles with flour, putting the sugars on their own piece of foil, so I could stand back and see that I had all the ingredients laid out before I began.
Tip #2 - before I measure out the flour, I stick my whisk in the canister and give the flour a good stir. This does the work of a sifter with a lot less time, breaking up all the lumps and settling that happens to flour in a canister.
Crack the egg on a flat surface then break into a ramekin to check for shells before adding to the batter
Tip 3 & 4 - I crack the egg on a flat surface instead of a sharp corner. The egg breaks into larger pieces. I crack it open into a ramekin. I can check for shell fragments before I add the egg to the batter. Chasing that one piece of shell around a mixing bowl is like trying to grab a toddler you just put sun screen on. I cream the sugars, vanilla and eggs in my stand mixer, scraping down the sides at least once. Tip #5 since the flour, baking soda and salt were already laid out on their own piece of foil it is easy to add them to a stand mixer by folding the foil and making it a chute for the ingredients to slide down. There is nothing more obnoxious than trying to add flour from a bowl into a stand bowl. Everything seems to get in the way – the mixer, the bowl, your hands. The foil chute makes it easy and one less bowl to wash. I add it in three batches and mix until the color comes back to the batter before adding the next batch of dry ingredients. Finally I add the chips, in this case Ghirardeli Double Chocolate Chips. They are larger than Toll House and have the great taste of bittersweet which I prefer to semi-sweet.
Tip #6 - Dump the dough onto a clean countertop or cookie sheet to make scooping more effecient
So now the batter is mixed and ready to go. I love Silpat mats and have used them for baking for years. Sheets of parchment paper work great too. Since I had a large batch of batter Tip #6 - I mounded it onto a empty baking sheet. Using a large ice cream scoop, I scooped out the dough, scraping it on the baking sheet so the scoops were consistent in size. I was making large cookies so I only put 8 on a sheet but then put two sheets in the oven at a time.
Tip #7 When baking more than one batch, rotate the trays halfway through to promote even cooking.
Tip #7 - After 7 minutes, I rotated top shelf to bottom shelf, giving each sheet a 180 turn as well. It keeps the cookies away from hot spots and they bake a little more evenly. If I only had one sheet pan at a time, I might still rotate 180 half way through, depending on the oven and the consistency of the heat.
Tip # 8 cool two minutes on the cookie sheet before you put them on a wire rack to finish cooling.
Thanks Ann for all the cookies through the years. They always taste better when you make them.
Share

Monday, July 19, 2010

Blueberry Chicken

I am a very discriminating berry picker. Not any berry will do. The color has to be dark purple, almost black and dusty looking. No pea sized blueberries for me. Dime sized if possible and the few elusive ones as big as a nickel go straight into my mouth.

I don’t stand at a single bush and glean every last berry. I squint and peer and search and then reach into the back of the bush for that big, fat one that everyone else missed. Needless to say when everyone else had full buckets the bottom of my bucket was barely covered. But by the end of the day, between Grace and I, we had enough to keep a large bowl in the fridge and freeze a few bags.


When everyone else is thinking buckles, crisps, cobblers and coffee cake I am thinking chicken. Meat with a fruit sauce is one of my favorite dinners. For company, I like to do a duck breast with cherries. Another favorite is pork chops with a port and blackberry sauce. Why not chicken with blueberries?
 I want to share with you how do it without giving you step by step directions. It is nice to have those “goto” dishes in your head where you can stand at the stove and toss in and mix and taste and tweak without being tied to a recipe.


Chicken with Blueberry Sauce

I started with 4 skinless boneless chicken breasts. I am cutting back on fat so no skin for me. If you like, this would be great with a boneless skin-on breast.


Drizzle a little oil in a skillet over medium high heat and place 4 seasoned chicken breasts in it. I sprinkled the breasts liberally with a chicken rub I had on hand but just salt and pepper will do. Place in a skillet and cook without disturbing for a few minutes until the bottom is a lovely golden brown. Turn the breasts over and cook for a few more minutes on the other side, then place in a 425 degree oven and cook for about 12-15 minutes or until firm when prodded. Searing and roasting is the best way to get a juicy chicken breast with the caramel outside that adds so much flavor and a juicy interior.

While the chicken is cooking, start the sauce. Throw 2 cups of berries into a small saucepan with about a cup of red wine (you could use chicken broth if you had no wine). Cook for about ten minutes until the liquid is a little reduced and the berries are all mushy. Add a little dijon mustard, a splash of balsamic vinegar and a couple tablespoons of jam. Any jam will do, use blueberry jam if you have. The jam will help thicken and sweeten the sauce. The vinegar and the mustard can be added to taste. They will help balance the sauce – a little sweet, a little tangy and a little tart. Start with a small spoonful and taste and keep tasting and tweaking. If you like it sweeter you can add a little brown sugar or some more jam, adding more mustard or vinegar for a savory sauce.

When the chicken is done remove it from the oven and let it sit for a few minutes while you finish the sauce.
Just before serving, if you have any berries left, throw a few into the sauce to just warm. I love the combination of the cooked berries with the fresh whole ones.
Slice the chicken on the diagonal and pour a nice heaping of sauce on each one and serve the leftover sauce tableside. Everything comes together pretty easily. The dish is perfect for company but easy enough for any night.


Share

Monday, July 05, 2010

One of my favorite things...


Although it won't fit in my toolbox I love my little waffle maker.


A few years ago during the Christmas season I was working at Williams Sonoma. I had a great discount and a small paycheck. Most of that paycheck went to tools. This mini waffle maker is one of them. It makes three mini waffles at a time. Three of you can start eating your own waffle while the next batch is being made, instead of dividing up one big one. A chirp lets you know when to peek. A teflon surface makes for easy clean-up. Cook up the extra batter and freeze. Who doesn't like a bag of little waffles in their freezer? Ready for ice cream or a quick breakfast.

Wednesday, June 23, 2010

Corn Pancakes with Black Beans for Maggie

I just came back from a long weekend in Oregon with my four sisters. We went on long hikes and long car rides together. Discussions ran the gamut of topics. Somehow it came up that my niece Maggie is cooking. My sister bemoaned that my niece was spending too much on groceries to make complicated dishes.

We cooks know that to make interesting and delicious food sometimes you need some ingredients that may not reside in the pantry. The dish that follows is by no means exotic. You can find everything in a normal grocery store. In fact I created this a million years ago when the kids were little and I wanted something that was both kid and parent friendly. The kids ate the pancakes with syrup and we ate them with the beans, sour cream and cilantro. This recipe is easy but still pretty tasty. Don't let the pancakes made with Jiffy corn muffin mix fool you. They have a gritty corn meal texture that compliments the smoothness of the beans and the heat from the salsa. And if you want to you can finish off supper with a pancake slathered in butter and syrup!

Corn Pancakes with Black Bean Salsa for Maggie

Salsa:
Oil
1 red pepper, cut into 1" squares
1/2 vidalia onion, cut into 1" squares
2 cans black beans, canned, rinsed
1 jar Pace Picantre Sauce, medium

Pancakes:
2 boxes Jiffy corn muffin mix
2 egg
4 tablespoons shortening, melted
2/3 cups milk
Chopped cilantro
Sour cream

To make the warm salsa:
Drizzle some oil in a saute pan over medium high heat. Add onion and saute the onion starts to soften. Add the peppers and cook until the peppers start to soften. Add the black beans and Picante sauce. Cook for a few minutes, stirring. When the beans and salsa are hot, reduce the heat to low. Make the pankcakes.

Pancakes:
Blend all the pancake ingredients in a medium bowl with a fork. Batter will be lumpy. Let batter sit a few minutes. Using a quarter cup measure or an ice cream scoop drop batter onto a lightly oiled non stick pan or griddle. Keep them fairly fair apart because the thick batter will spread as the pancakes start to cook. Flip when the edges appear dry, peeking every now and then at the bottom so they don't burn. Also these pancakes are pretty thick so don't cook on too high of a heat or they will be raw inside.

Put two pancakes on a plate. Pile with the warm salsa. Add a dollop of sour cream and sprinkle liberally with salsa.

Let me know if you make it Maggie. And don't let your mom gives you grief about the leftover cilantro!
Serve with Cilantro and sour cream
Share

Saturday, June 12, 2010

Food trucks the Ohio way.

It is a little strange that after 4 months of living here with nary a food truck in site, I would stumble upon two in one week and eat at both of them.


Taco Truck

I am sad to say I never got to experience a taco truck in San Francisco. John ate at one frequently in the ad ghetto. I always wanted to go and get a tongue taco but it never happened.

Back in Ohio, We were dropping off Grace somewhere and saw this truck in the parking lot near a Popeye's Fried Chicken. It was a rainy grim day but we braved the elements (okay John braved the elements, I sat in the car) to go order at the window, hurry back to the car in the rain, run back out and get our styrofoam containers and then eat pork tacos in the car. We found out we were lucky to catch them because they keep short hours. Was it a taste of California? Not exactly but we were glad we tried it.

Dimanddemsum truck
Dim and dem sum truck
I heard about this truck from a friend. We were going to Facebook track it down and go for lunch one day but there was no sign of them anywhere. Turns out they were waiting for a piece of equipment and unable to cook. Why do I know? They magically showed up at a Slow Food/Humane treatment for animals event that I attended, along with a couple of goats and Grace, my daughter, (different story, another blog.) Grace was excited because she thought there might be actual dim sum. She was disappointed in that respect but not in the tater tots and cheese curds she had (boy does that scream Midwest!) They had a house made hot sauce and a house made ketchup to jazz them up. Apparently they were going to serve goat tacos but when they heard that Carolina and Odie were coming (aforementioned goats) they wisely chose beef (no cows were present). Was it crazy good? No but there was thought and creativity and a little passion thrown in. I will definitely track them down again. Also kudos for the "live strong" style bracelet business card.


Odie and Carolina

I think a lot about the Porchetta and fresh herb sandwich at the Roti truck at the Ferry Building. I just like to think about that sandwich sometimes. The pork roast fresh off the rotisserie, all juicy and tender, piping hot, piled on a bun with a pile of fresh herbs. Hot, juicy, drippy, melting pork with crunchy herbs…Stop. Don’t go there. Step away from the porchetta day dream.
So there might be hope for the food truck scene here after all. Maybe I could get a Roti franchise to come?
Share

Tuesday, June 01, 2010

Deconstructed Eggs Benedict Salad

I had a great dish recently in San Francisco. Two perfectly poached eggs on a raft of polenta, accompanied by a field green salad with asparagus and fava beans and a vinaigrette. The creamy, rich egg yolk and grainy polenta were a perfect foil for the bitter greens and sharp vinaigrette. The fresh fava beans and skinny, spring asparagus spears added just enough texture and flavor variety to complete it. I enjoyed it so much I was sorry I was sharing it with my friend LeAnn. I was tempted to point at a passing sailboat (we were in Sausalito at Cibo) but hung resolutely to the agreement to eat only half. It got me thinking about eggs which led me to think of my favorite egg dish, Eggs Benedict. Next thing I knew I was creating a supper salad of Deconstructed Eggs Benedict. The lemony hollandaise is now a tart lemon vinaigrette with a poached egg on top. The english muffin is now an English muffin French Toast crouton and salty pancetta replaces the canadian bacon. Make sure you make enough. You won't want to share.

Deconstructed Eggs Benedict Supper Salad

Lemon Vinaigrette:
1/4 cup freshly squeezed lemon juice (2 lemons)
1/2 cup good olive oil
1/2 teaspoon kosher salt
1/4 teaspoon freshly ground black pepper
Dash of Tabasco

½ pound Pancetta

8 eggs for poaching

2 eggs for English muffin croutons
1 T. Dijon mustard
½ cup milk

4 english muffins, split

8 cups spring lettuce mix

Whisk together the lemon juice, olive oil, salt, and a dash of Tabasco in a small bowl and set aside. Rinse and spin dry the lettuce. Put it in the fridge covered with a damp paper towel so it stays nice and crisp.
Dice the pancetta and cook until crisp. Drain on a paper towel. Poach the 8 eggs in boiling water until desired doneness. Place them immediately into a bowl of ice water to stop cooking. Leave them there for now. You can do this a couple of hours ahead of time if you need to. Keep the egg water warm on low heat if you are eating right away. You can use it to re-warm the eggs when you are ready to serve..

Preheat a non-stick skillet or griddle to medium high heat. In a small bowl, whisk together the 2 eggs, mustard and milk. Dip the English muffin halves into the eggs and milk, like you were making French toast, coating both sides and place in the hot skillet drizzled with olive oil. Cook until golden brown on both sides. Repeat with the other three English muffins. Remove from pan and cube.

Place the poached eggs back in the hot water for a few minutes to re-warm the eggs. Put the lettuce in a large bowl and drizzle with some of the vinaigrette. Taste and add more vinaigrette if you like. Divide the lettuce onto 4 large plates. Sprinkle with cubed pancetta and the english muffin cubes. Top with the warm poached eggs. Season with salt and freshly black pepper. Serve.

This recipe can be done in stages throughout the day. The pancetta can be made ahead and warmed for 10 seconds in the microwave. The vinaigrette can be made ahead and refrigerated. The eggs can be poached in advance.

Share

Tuesday, May 11, 2010

Oatmeal Almond Blueberry Bars


On Mother's Day I was given a container of left over blueberries and blackberries as we said our goodbyes. A recent post I had seen on a rhubarb bar inspired me. What about a blueberry blackberry bar? I wanted more than a crumb topping though. I wanted something more like the granola bars I have been making. I wanted that flavor of toasted oats and slivered almonds to pair with the juicy berries. And I recently made a toasted coconut truffle and really enjoyed the toasted coconut flavor. Hmm - that wouldn't hurt either!

Combine 1/2 cup brown sugar, 1/2 teaspoon baking powder, 1 1/2 cups flour in a food processor and pulse briefly. Cut a stick of butter into thirds lengthwise , turn and cut again and then cut into slices to form pea sized squares of cold butter.


Add the butter and one egg to the food proceesor. Pulse in the food processor until the mixture is like bread crumbs. Pour into a prepared 8 inch square pan. Cover with a piece of was paper and press with your fingers or a small rolling pan to form a flat bottom.


Take 3 cups of fruit and toss in a bowl with 2 tablespoons flour and a 1/4 cup sugar. Pour onto the crust.

Put 1/2 cups old fashioned oatmeal, 1/2 cup coconut and 1/2 cup slivered almonds on a foil lined pan in a 400 degree oven for 8-10 minutes or until slightly brown. Toss in a bowl with a 1/4 cup flour, 1/4 brown sugar and a 1/2 stick of melted butter. Stir to combine and pour on top of the fruit.

Cook for 35- 40  minutes in a 375 degree oven. If you serve it warm the berries will burst warm and liquid in your mouth but it won't cut itno nice slices until it is cooled.

Sunday, May 09, 2010

Life Actualliy Is a Box Of Chocolates

Top: Fleur de Sel Caramel in dark chocolate, Left: Chai Infused Ganache, Right: dark chcolate, coconut, lemongrass ganache, dipped in white chocolate and rolled in toasted coconut

Lately my life is a box of chocolate. I am reading about chocolate, I am searching out chocolatiers at home and when I travel and I am making chocolate. If I need a reason it is because I am taking an online professional chocolatier course at Ecole Chocolat. If you know me at all, you know I have been making toffee and caramels for years. A few years back I took it up a notch by buying my own chocolate temperer (I’ll explain what that is later.) As part of the course, I spend a lot of time reading about chocolate, the origin of chocolate, how it can be grown only near the equator, how the beans have to be fermented, like wine, to develop that flavor we all love, and much more.

An important assignment in the class is to learn how to temper chocolate by hand. Most people don’t know it but chocolate is a fickle substance. There is a science and an art to getting chocolate to have that deep shine and snap when you bite it. Done incorrectly, chocolate never quite hardens or it develops clouds of gray “bloom” or can have a grainy texture when you bite it, not crisp with a clean audible break. The science in a nutshell has to do with melting the chocolate to a high temperature and then bringing it back to cool to a specific temperature. The key is to bring the temp to the two degree range it needs to stay at and keep it at that range while you work with it.
I have a hair dryer and a heating pad that are now covered in chocolate trying to keep that 2 degree perfect temperature. Tricky stuff. I don’t quite have it perfected yet but I got some really good batches of chocolate made this weekend using that and some other techniques I had never used before. Most took a couple days to complete and there is chocolate on the wall (hair dryer – don’t ask) but the home team agrees that they were all worth it.

The first is a Chai Tea dark chocolate ganache square. I infused heavy cream with an organic Marsala Chai Tea, made a dark chocolate ganache (fancy work for mixing chocolate and cream and a little butter) and then cut it into squares and dipped it by hand in more Vahlrona 63% dark chocolate.

The second kind I made is a real first for me – a molded chocolate. I filled my new triangle shaped molds with dark chocolate, emptied it to leave behind a chocolate shell and let it set, then filled the mold with a soft, white chocolate based sea salt caramel. It sat for a day to firm up and then I topped it with chocolate. A miracle occurred. They actually came out of the mold! All of them! Very exciting and fulfilling. The caramel stayed liquid and salty inside it little shell.

The last was a dark chocolate ganache infused with coconut, lemongrass and coconut rum, dipped in white chocolate and then rolled in freshly toasted coconut. I don’t think the lemongrass was fresh enough so I probably could have added more to infuse it. You don’t notice it.

The next assignment is to create some of my own flavors. So my life is a box of chocolate at least for the next few months. And if you are in the neighborhood stop by. We can only eat so many!


Share

Tuesday, May 04, 2010

Shaved Asparagus Salad

This is a perfect spring time recipe when the first asparagus appears at the farmer's market. For those of us that live in colder climates that time is now. My California friends have probably been eating home grown asparagus for months!

Shaved Asparagus Salad

Comforts Shaved Asparagus Salad has received cheers from its customers. It uses raw, thin sliced asparagus and if you’ve never tried raw asparagus, it can transform asparagus haters in a minute.

Serves four

12 large asparagus, with the tough ends snapped off
2 hard boiled eggs, peeled
½ cup dried tomatoes, julienned
¼ cup pine nuts, toasted lightly in a dry sauté pan
4 slices bacon, cut into ½ pieces and cooked crisp (optional)
8 cups loosely packed mixed Salad Greens, washed and dried
Champagne vinaigrette:
5 Tbsp. mild olive oil
2 ½ Tbsp. Champagne vinegar (or lemon juice)
2 tsp. Dijon mustard
½ tsp. ea. salt and fresh ground pepper
2 tsp. honey

Make the dressing: Place all the dressing ingredients in a small covered jar and shake until combined or blend with a stick blender.

Lay three stalks of asparagus on a cutting board and slice as thinly as possible on the diagonal. Repeat with the remaining asparagus. Place the torn salad greens in a bowl and dress lightly with the vinaigrette, reserving some of the dressing for the asparagus. Divide the lettuce among four salad plates and top equally with the nuts, dried tomatoes, and bacon. Using the largest holes on a box grater, grate the hard boiled eggs over the salads, about a half egg per plate. Now add the asparagus to the bowl you tossed the greens in and dress lightly. Divide the asparagus on top of the four salads equally.

Have fun with this salad by adding your favorite chevre or feta cheese. Use a regular Spring Mix salad blend, all frisee or no lettuce at all. Replace the pine nuts with toasted pecans or even candied walnuts. Serve over a bed of thinly sliced tomatoes when they come into season instead of dried tomatoes. Instead of a hard boiled egg, serve a poached egg on top. The possibilities are endless!


This recipe is courtesy of Glenn Miwa. It is one of the many I am testing for a Comforts cook book.
Share